|
AntiVirus resource checks incoming mail for viruses and if detects any, sends e-mail notification about it and deletes the virus mail.
You can enable antivirus resource for all mail domains in your account, for specific maildoman and for mail resources of specific maildomain.
To enable antivirus for the entire account:
- Select Account settings in the Account menu. The following page will show:

- Click to add antivirus resource for all mailboxes or for all mail resources (box, forward, alias, responder) in this account.
To enable antivirus for a maildomain:
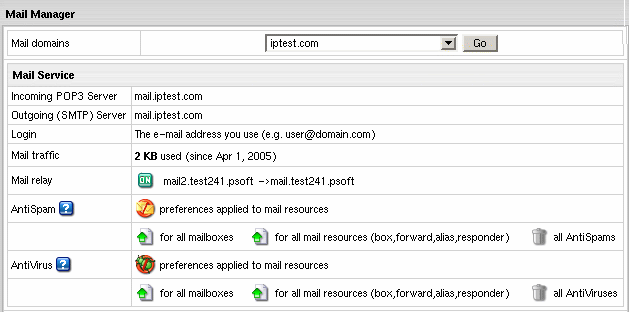
- Go to the Mail Info menu and select the mail domain from the drop-down box.
- Click Go and you will see the mail service details of the chosen mail domain:

- On the page you will be taken to, add antivirus resource either for all mailboxes of this mail domain
or for all mail resources (box,forward,alias,responder).
- Click the Submit button at the bottom of the form.
To configure antivirus protection for a mail resource:
- Click the e-mail address in the E-mail list on the Mail Controls page. The following page will appear:

- Check the AntiVirus box.
- Click the Submit button at the bottom of the form.
- On the Mail Controls page click the Antispam icon in the Resources included column:

- The following page will show. Edit the Antivirus preferences if necessary.
By default, it is set to Remove all incoming mail that bears a virus.

Mark as virus: this will tag the email as virus, i.e. add the word virus to the
subject line of the email and then forward the email on to the client as an
attachment with details.
Remove: this will delete the email so when the client performs
a send/recieve, they will never see the email.
Move To: this allows you to specify a mailbox infected email goes to.
The client will never see this email unless they access the specified mailbox.
- Click Submit.
|