|
H-Sphere supports all versions of RealServer that have ISPHosting support.
RealServer can be installed on a web box or a separate box with apache.
Installation Procedure
- Install RealServer with ISPHosting support on a web box or a separate box
into /hsphere/shared/RealServer as instructed by
RealServer documentation.
If you set it up on a web box, specify 8080 port instead of the default 80, which is used by apache.
During the installation, note the following data, as you will need them on subsequent steps:
- RealServer IP
- RealServer Admin Port
- Administrator Login
- Administrator Password
- Add the following line to the RealServer crontab:
0 7 * * * nice -15 /hsphere/shared/scripts/cron/rmserver_analyze.pl
- Launch RealServer with the following command:
/hsphere/shared/RealServer/Bin/rmserver rmserver.cfg &
- Log into your RealServer interface using administrator login and password. To get there,
type this URL in address field of your browser:
replacing RS_IP and ADMIN_PORT with the RealServer IP and admin port you were given during the installation.
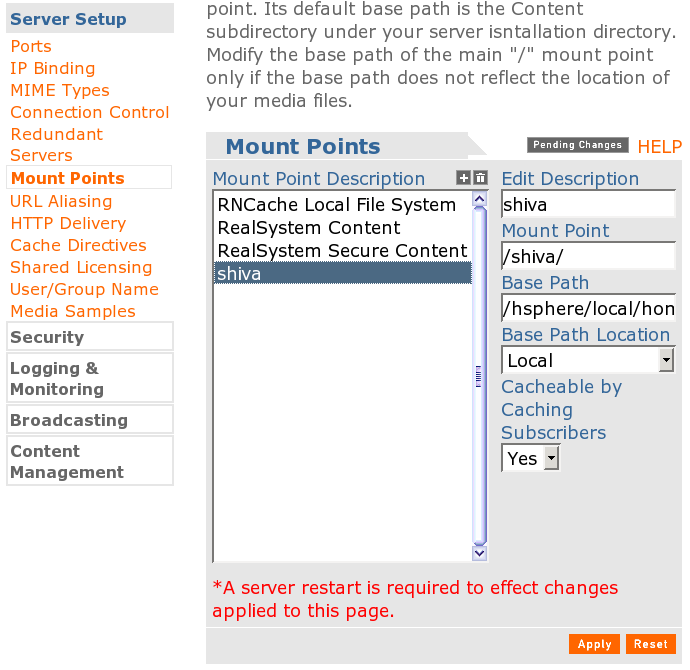
- In the left menu, select Server Setup -> Mount Points.
- In the form that appears, add mount point /shiva/ -> /hsphere/local/home :
- Click Apply. The status window will open:
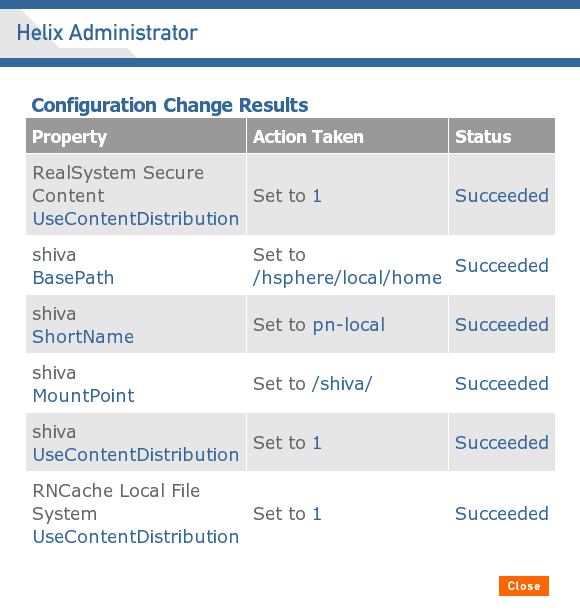
Close this window.
- Click Restart Server in the upper right corner of the browser window to restart RealServer:

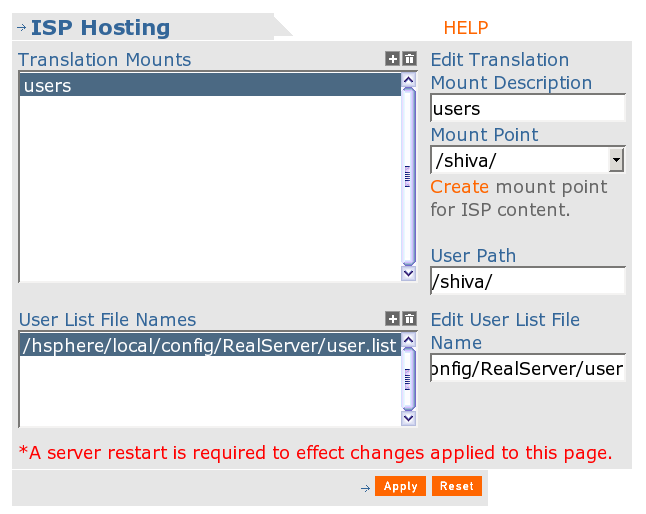
- Select Content Management -> ISP Hosting in the left menu:

- In the ISP Hosting form, add the following settings:
Translation Mounts: user
User List File Name: /hsphere/local/config/RealServer/user.list
Description: users
Mount Point: /shiva/
User Path: /shiva/
- Click Apply. The status window will open:
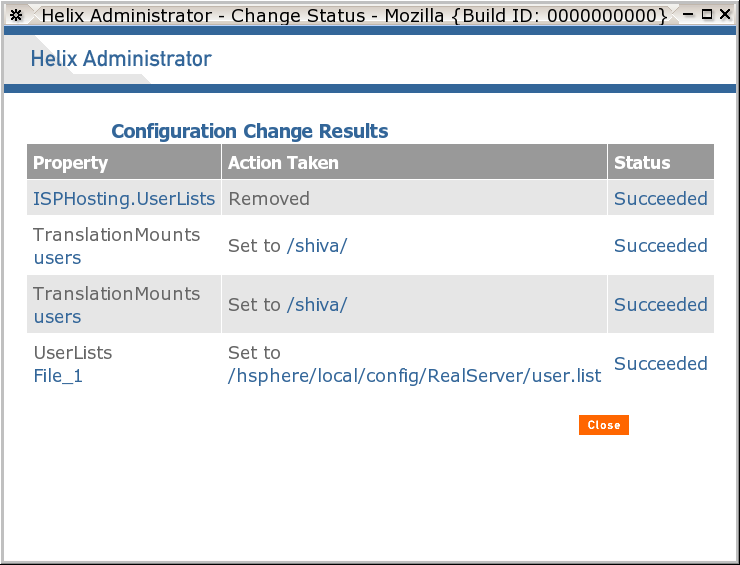
Close this window.
- Click About in the upper left corner of the browser window:

You will get a window with information about your license.
- Go to the admin control panel and
add the box to H-Sphere.
- Now you can proceed to RealServer settings that are not related to H-Sphere.
|